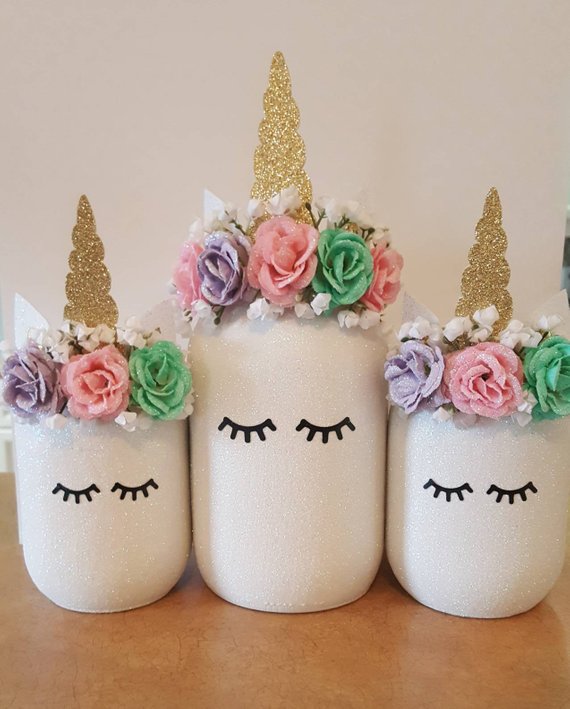
Paint the jar with white acrilic paint and add the glitter while it is still wet.
While waiting for the paint to dry, use some air dry modeling clay to make the ears and horn.
To make the horn, make a snake with the clay, make one end pointy and the other one fat.
Make the snake become bigger and bigger has it goes towards the fat part.
Wrap it around a thin stick so it makes a horn shape. To make the ears, just make two roundish
triangles.
When the paint dried, draw two "U"s for the eyes with some lashes. Do this in black.
Now, when the clay has dried, make smaller triangles with the pink acrilic paint in the ears.
Also color the horn with gold acrilic paint and the nail polish.
Stick the ears and horn to the
lid of the jar, using a hot glue gun or super glue.
Now add your fake flowers just below the lid, hiding it.
Paint the jar blue and stick the googly eyes in place.
Draw the mouth a little below the eyes (make whatever mouth you want, I made a slightly smily mouth with balck paint and white triangles under it as the teeth).
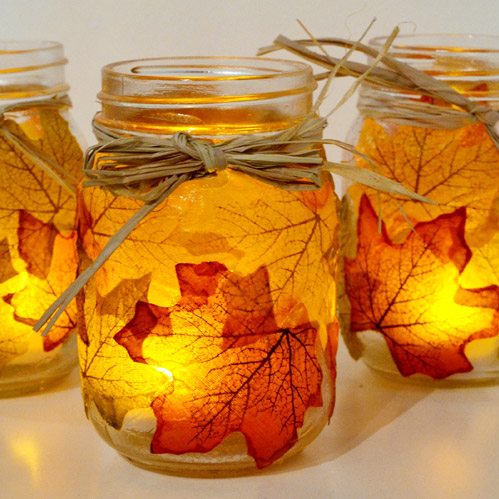
Cover a part of the jar with mod podge using your sponge brush. Then stick a leaf on top. Don't dab the sponge brush, use it to smoothen out the edges, by also putting a tiny on top of the edges.
If you want, color your lid gold and put some brown string around it. Put your mini candle in the jar,light it and close the lid.
Fill in 1/4 of the jar with clear glue, the rest with water. Mix! After you mix, it may become foggy. It should clear up in about 1 day or more.
Add in your food coloring, glitter or beads/mini decorations to make it pretty.
Flip your jar upside down (obviously with the lid on) and enjoy the little beads slowly going to the bottom.
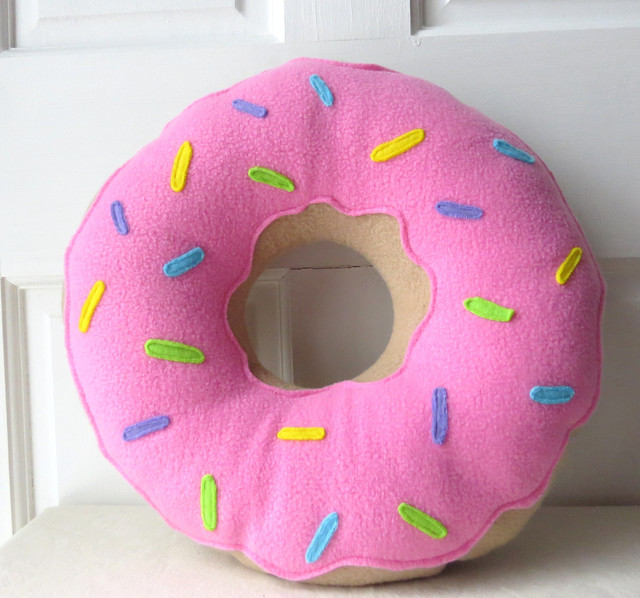
Fold the beige felt in half. Then, with a round object
(size of your choice) trace a cricle on the felt.
Then, with a smaller round object
trace another circle in the middle of the big circle.
Now, cut the circle. Two circles should come out of it, because you folded the felt in half.
Cut the smaller circle (which is supposed to be on only one of the circle felt)
in the center of the felt and then place it on top of the other felt cricle with no hole in the middle.
Now, with the marker, trace the circle on the other felt using the felt with the hole
which is on top of it. Also cut that small circle.
Hot glue (or sew)
the felts together, leaving a small space to put the filling in.